Snap Tags
Snap points pull a piece into an exact spot when it is dropped nearby. Snap tags decide which pieces a point will take. A tag is a short label such as card-slot or dice. Put it on the pieces and on the points that belong together, and only those pieces land in those slots; everything else slides past.
How Matching Works
When you drop a piece, the room looks for the nearest snap point within reach (about three quarters of an inch at table scale) and checks its tags:
- A point with no tags accepts any piece.
- A point with tags accepts a piece only if the piece carries at least one of them. A piece with no tags never lands on a tagged point.
- A piece's own tags never hold it back on an untagged point. Tags only restrict where the point has them.
- A snap point attached to the piece being dragged is ignored, so a board never snaps to its own slots.
Two switches stop snapping altogether, tags or not: the Objects snap checkbox in the snap-point panel turns it off for the whole room, and right-click → Prevent Snap to Point turns it off for one piece (it is also one of the layer restrictions).
Tagging Pieces
In the component editor
Cards, decks, tokens, boards and other pieces have a Snap Tags field. Type a tag and press Enter (or click Add); click the × on a tag to remove it. In the Component Wizard the field is on the Playtest Settings step, which also offers the tags already used in this project as one-click suggestions; in the inline editor on the Components page it is on the Advanced tab. Tags saved here are part of the blueprint, so every copy you spawn carries them.
In the room
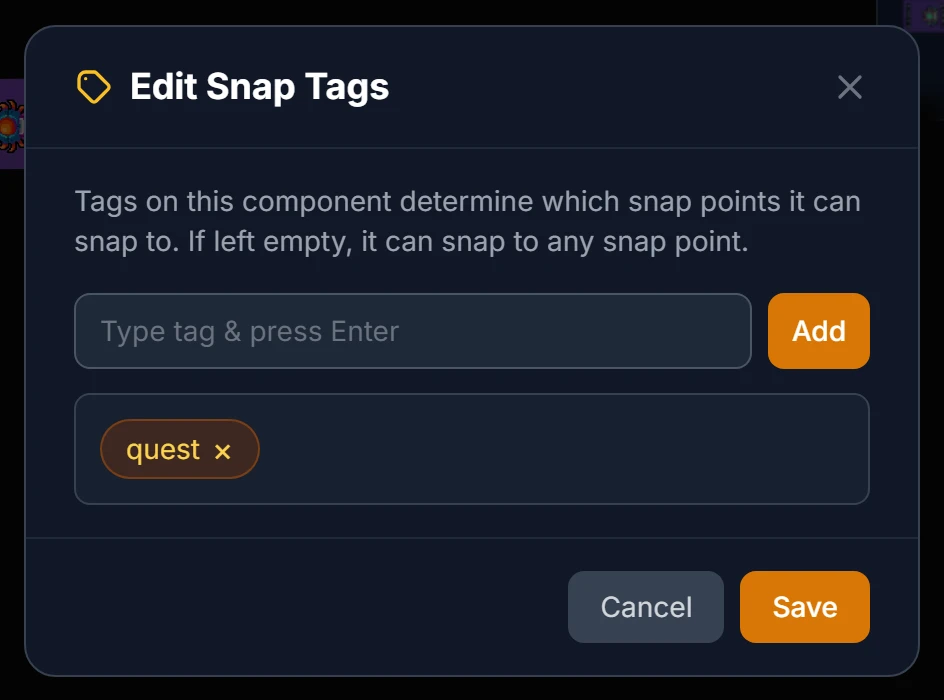
The host can tag the live copies on the table without touching the blueprint. Right-click a piece and choose Snap Tags (the menu item shows a count once the piece has tags). The Edit Snap Tags dialog works like the editor field: type a tag and press Enter, or pick from Used tags, the tags already on the table's points and pieces. With no tags the piece reads "No tags — open to all". Select several pieces first and one dialog tags them all.
Decks and stacks pass their tags down. Tag a deck or a token stack and every card or token inside it gets the same tags, so a card drawn from a tagged deck lands in a tagged slot. The same happens when you change a deck's tags through right-click → Edit Component….
Where Tags Are Saved
Tags follow the data hierarchy: tags set in the room live on the table copies, and tags in the component editor live on the blueprint. To push a piece's table tags up to its component, right-click it and choose Save State to Component; for a deck or stack, Save Cards as Components or Save Stack as Components writes each card's or token's tags to its own component. Restore from Component goes the other way and replaces the piece's tags with the blueprint's.
Tagging Snap Points
The other half lives on the points. In the room, open the snap-point tool, select the points and set their Tags in the panel; in the component editor, points placed on the Snap Points tab can carry tags too, so a player board can ship with its slots already tagged. Both are covered in Snap Points.
A Worked Example
A player board has three quest slots, and the game also uses resource tokens:
- In the component editor, give the board three snap points on the slots and tag each
quest. - Give the quest cards (or their deck) the tag
quest. - Leave the resource tokens untagged.
On the table, quest cards click into the slots and tokens do not, while every untagged snap point elsewhere still takes anything.
Note
Tagging in the room is a host tool: the Snap Tags menu item only appears for the host. Once tags are set, snapping works for every player.
Related: Snap Points · Grids & Snapping · Components · Editing & Syncing Components · Layers